Tuesday, December 30, 2008

Chocolate chip almond cookies coated with dark chocolate

More almond cookies from the kitchen of Food Haven...
Original recipe can be found here


Happy holidays everyone!

Thursday, December 25, 2008

Peanut Pancake - Min Jiang Kueh

This is a local favourite snack which is savoury yet sweet at the same time. It has been my favourite since young. Got this recipe from Baking Cottage and almost every step and ingredient was followed. But the outcome didn't seem as good as hers.

Ingredients for pancake:
150 g plain flour (sifted)
1 tsp instant dry yeast
30 g caster sugar
1/4 tsp salt
200 ml tepid water (lukewarm water)
2 eggs at room temperature, lightly beaten
60 ml canola oil (I used 50 ml of olive oil)
1/2 tsp alkaline water (can be found at Phoon Huat)
extra tepid water if neccessary


Ingredients for peanut mix: (I didn't want sesame so I omitted that)
100 g peanuts
50 g caster sugar, or to taste

Mix together flour, yeast, sugar and salt in a mixing bowl.
Add in 200 ml tepid water and stir to mix well. Put in a warm place, cover loosely with cling wrap, and let proof until bubbly and double in size. (it took me about 45min for it to double in size)


Once the batter double in size, add lightly beaten eggs, oil and alkaline water.
Beat to mix in well.
Let stand 5 to 10 minutes before cooking. (the batter at should be runny).
The batter should immediately flow into a circle as soon as you pour into the pan.
If it is too viscous and takes a little while to flow into a circle, mix another tbsp or so of tepid water into the batter.
Heat a non-stick crepe pan (top about 20 cm diameter) until hot.


Pour a little canola oil, then wipe over the surface with a paper towel.
Pour about 125 ml (or more to make it thicker) of the batter.
Cover the pan with a lid and cook over medium to low heat for about 3 to 4 minutes, or until the top is bubbly and just set.
Spoon sesame peanut mix onto half of the pancake, lift the other side and fold over.
Best serve hot or warm.


I had a little trouble with a thick pancake. The inside was mushy and it didn't taste good. So I made a flat pancake instead of thick ones which you find outside.


Thursday, December 18, 2008

Nutella Sandwich

Without even mastering the basics of baking, I was ambitious to attempt a swiss roll. Happy Home Baking's blog got me very interested. Being a little too ambitious, my swiss roll failed but I managed to do a 'sandwich' instead.


3 eggs, bring to room temperature
65g sugar
80g cake flour (sifted)
20g unsalted butter, melted (I use margarine)
2~3 drops vanilla extract
Part I
Line a 9" x 12" (23 x 30cm) Swiss roll tray with parchment paper, set aside. Pre-heat oven to 180 degC. (I did not have this size so I used a much smaller tray but of a higher depth so my swiss roll became too thick!)
Whisk eggs and sugar on HIGH speed for about 7 mins, until the batter double in volume with electric mixer (it can get quite noisy). You'll see the transformation.
Turn to LOW speed and whisk for another 1 to 2 mins. According to HHB, whisking at low speed helps to stabilise the air bubbles in the batter.
Add sifted cake flour into the batter in 3 separate addition. With each addition, use a spatula, gently fold in the flour until well blended.

Add the melted butter and vanilla extract, fold with spatula until well blended.
Pour the batter into the tray.
Spread and smooth out the batter evenly. Bake for 10~15 mins*, until the surface turns golden browned or until a skewer inserted in the centre comes out clean.

Part II (the correct method)
Remove tray from oven. Remove sponge layer from tray (with parchment paper still intact), place it in a plastic bag (to retain moisture). Tie the plastic bag and leave it to cool. (I totally omitted this step so my cake cracked!)
Upon cooling, remove the parchment paper, and turn the sponge layer with the 'skin' side down on a sheet of clean parchment paper.
Spread with nutella (you can try whipped crseam and cut strawberries) and roll up the sponge layer by lifting it up with the parchment paper. Place the rolled cake seam side down.
Cut and serve.
Mine cracked so I simply halved the cake and sandwich them together :P

Saturday, December 13, 2008

Chocolate Coated Almond Cookies

This is an interesting recipe and most importantly, it tastes fantastic! Esp the chocolate coating on the cookie.. it's heavenly! But pardon me for my bad photos here as I couldn't resist eating them rightaway so I hurried through the photography process :)


(made some choco chip cookies as well)


60g butter (softened)
50g caster sugar
1/2 egg (estimation)
75g plain flour (sifted)
40g ground almond
60g dark chocolate (Lindt is good!)


Preheat oven to 200deg C. Cream butter and sugar. Beat in egg and almonds. Pour in flour and mix well. Spoon batter (in 20 cent coin size) onto tray with grease proof paper. Bake for 10 min. Double boil the chocolate. After baking, leave cookies to cool in pan for 2 min before transferring to a cooling rack to cool further for 30min. Once cooled, dip it into chocolate and let it set. Ready for consumption!


note: you may choose to refrigerate the cookies to further set the chocolate. I reckon it shouldn't affect the texture of the cookies

Monday, December 8, 2008

Green Tea Chocolate Chip Cake

I bought green tea powder some time ago but never got to baking green tea cake. Here's my own concoction of green tea cake with my all time favourite of chocolate chips. Hope you can enjoy it as much as I do.

2 egg yolks
10g sugar
1/4 tsp vanilla essence
2 egg whites
50g sugar
55g cake flour (sifted)
35g melted butter
3/4 tbsp green tea powder
30g chocolate chips

Whip egg yolks, sugar and vanilla essence till smooth and creamy. In a separate bowl, whip egg whites till soft peaks form then add sugar and continue whipping. Fold this mixture into the egg yolk mixture. Sieve in flour and mix well with spatula. Add in green tea powder and combine well. Pour in melted butter. Pour into a 18-20cm cake pan and throw in chocolate chips randomly. Bake at 190 deg C for about 20min.


(Sponge cake source adapted from Alex Goh: Fruity Cakes)

Saturday, November 29, 2008

Coffee from the Highlands

Did a photoshoot for My Cafe Adventures. It sells quality coffee beans and powder from Vietnam. More information can be found here. http://www.mycafeadventures.com/


Friday, November 28, 2008

Chocolate Swirl Muffins

I had about an hour to spare last Sun. I felt very weird not baking anything for the weekend, so I managed to pyscho myself to DO SOMETHING! Otherwise I would not have a 'great weekend'.

It was a simple task as I baked half the portion. So everything was quick, clean and easy! These muffins are small and serve as a good afternoon snack or breakfast. I use margarine so it's lots healthier.

Serves about 7.

A
2 eggs
60g caster sugar
1/4 tsp vanilla essence

B
55g plain flour (sifted)

C
40g melted butter

D
About 20g Lindt chocolate (to double boil)

1. Whisk A at high speed until pale yellow (something very smooth and creamy)
2. Add in B and mix well with a spatula.
3. Add in C and combine thoroughly.
4. Pour batter into 7 muffin cups (3/4 full) and drop melted chocolate over. Swirl with a toothpick.
5. Bake at 180deg C for about 25min.


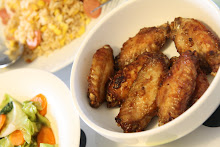
(ok not very well taken pics as they were taken on my study table and using compact cam)

Alternatives:
You may add orange zest if you want something citrus, or chocolate chips if you want a double chocolate flavour. Or you can add both! It's free play!

Sunday, November 16, 2008

Carrot Walnut Cake

I've been wanting to try this receipe for a long long time. So finally here it is. It tastes great (esp after 1 night). It is light, not too sweet, moist and not very heavy on cinnamon. It's just perfect. I want to share the receipe with everyone!

(A)
3 eggs
150g milk
300g sugar
1/2 tsp salt

(B)
180g vegetable oil (I use canola, but you can also use olive oil)
1 tsp vanilla essence

(C) (all sifted)
280g plain flour
1 tsp baking powder
1 tsp baking soda
1 1/2 tsp ground cinnamon

(D)
150g carrots, shredded (original receipe calls for 200g but I was too tired from shredding!)
120g walnuts, chopped

Topping
200g cream cheese (original receipe of 250g was way too much for me)
60g butter
120g icing sugar
1 lemon zest, grated
1 1/2 tbsp lemon juice, 1 tbsp orange juice (orange juice is optional as I had leftover)

Cake
1. Whip A till well combined, followed by B.
2. Sieve in C and mix well.
3. Add in D and mix well.
4. Pour batter into a 30x23cm moud and bake at 180deg for 40min.


Topping
1. Beat cream cheese until smooth.
2. Add butter and continue beating.
3. Add sugar and baet till well combined.
4. Add lemon zest and juice. Mix well.
5. Spread topping on a cooled cake otherwise it will be very watery on the cake.


(Source adapted: Fruity Cakes by Alex Goh)

Saturday, November 15, 2008

Orange Chiffon Cake

Had alot of oranges in the house.. so I wanted to make use of them for a cake. Therefore I tried this chiffon cake. It was fantastic. Light, healthy and fragrant. It uses vegetable oil and there wasn't any butter. What's more, it's easy to prepare.. within an hr. It's awesome.. here's it! (slightly revised)


I use a small tube pan so I halved the recipe. (this is the half recipe)


(A)
2 egg yolks
10g sugar
1/8 tsp salt
30g vegetable oil (I use canola oil)
35g milk

(B)
1 orange zest
1 - 1 1/2 tbsp squeezed orange juice (more orange juice makes it more fragrant and dense, not so chiffony)

(C)
50g plain flour
1/4 tsp baking powder

(D)
2 egg whites
50g sugar

1. Mix A till well combined, then add C.
2. Whisk egg whites in D till soft peaks form, then add sugar.
3. Continue whisking till stiff.
4. Take 1/4 of the meringue and mix with egg yolk mixture and combine well.
5. Mix the remaining merginue with the egg yolk mixture and mix well.
6. Add in B and mix well.
7. Pour into a tube pan (about 18cm) and bake at 170deg C for 45min. (it will rise quite a lot)
8. When cool, remove from mould.

Optional:

Some choppped walnuts on top to bake.


(reference: Alex Goh Fruity Cakes)

Sunday, November 9, 2008

I've been tagged!

I was surprised to have been tagged by Happy Home Baking on my little humble blog. She has a fantastic blog with awesome recipes and photos of her masterpieces. Well, to continue the tag, here are the rules to observe.

1. Link to my blog (tagger) on your blog.
2. Give seven facts about yourself.
3. Tag another seven blogs by leaving a comment on their blog and letting them know they were tagged and listing them (and their blogs) on your blog.


Me myself

1. I love photography since young but only started getting serious only last year :) (what a procrastinator!)

2. I love baking and cooking but 70% of the time the result is disappointing. (can see cannot eat quality)

3. I love outdoors and lead and active lifestyle. I have an 'itchy and sharp butt' (can never sit still).

4. I love grocery shopping and can never step out of a supermarket empty handed.

5. I do my budget for shopping, but never keep within it.

6. Horror movies are my favourites (but I get spooked too).

7. I emphasise alot of aesthetics (came from advertising background)

Here are the 7 other blog sites which I often visit:

1. Small Small Baker
2. Baking Mum
3. Baking Cottage
4. Kitchen Corner
5. Taste of Time
6. Fresh from the Oven
7. Cuisine Paradise

Enjoy!

Wednesday, November 5, 2008

Belacan Rice with Green Mango

A fiery lunch! You can top it up with garnishes like tangy sliced green mango and fresh coriander. Instead of prawns as the main ingredient, you can use minced chicken or pork, or even diced bacon or ham!


Serves 3. Cooking time 10min. Prep time 10min.

120g small grey prawns, shells and heads removed. (Cut a slit on the top part of prawn so it opens up when fried)
3 tbsp oil
2 cloves garlic, finely chopped
3 shallots, finely chopped
1 tbsp ready prepared sambal belacan (more if you like it to be more spicy)
3 tbsp fish sauce
4 cups cold cooked rice (overnight rice is better as it doesn't stick and not as soggy as freshly cooked rice)
Some sliced fish cake
1 egg, beaten with some pepper
1 small green mango (optional)
A dash of mixed herbs and curry powder (optional)
Pinch of salt

Dash of pepper

Garnishes
Crispy shallots and coriander leaves

Method


1. Rinse prawns and pat dry then set aside.

2. Heat 2 tbsp of oil in wok over high heat. When hot add garlic and shalllots and fry for 30sec until fragrant. Add prawns, fish cakes, sambal belacan and fish sauce and fry vigorously for 1 min or until prawns are cooked.

3. Remove prawns and fish cake. Fry egg and stir well to break the egg. When half cooked, throw in the prawns, fish cake and rice. Toss well to mix. Fry 1-2 min more or until heated through.

4. Add 1 tbsp of oil if mixture becomes too dry. Add a dash of pepper, mixed herbs and curry powder to taste. Add more fish sauce if desired. Add a pinch of salt to taste.

45. Peel green mango. With sharp knife, cut flesh into thin slices then stack slices and cut across into thin shreds.

6. Sprinkle rice with mango, coriander and shallots. Ready to serve.

Tip: never fry the rice together with all the ingredients at the same time. The food will have a very flat taste. Fry the ingredients individually to bring out each unique flavour to the dish.

Tuesday, November 4, 2008

Halt

I have just embarked in a new phase of my career. Life's gona be hectic and more busy in view of the 3 hr gruelling travelling time to and fro work. I'll be less spontaneous in my blog entries but will still try to keep it going during the weekends!

Pls do not stop visiting my blog...

:)

Sunday, November 2, 2008

Healthy Chicken Macaroni Soup

I was packing my room - a long overdue task I had to do - and came across old recipes which I thought I had to keep before throwing the bits and pieces of paper away. But instead of 'keeping' it as it was already yellow, I would blog it. I haven't tried this recipe myself though.

3 ltrs of water
1 slice ginger
1 clove garlic
1 small chicken (about 1.2kg)
salt to taste
500g macaroni

Garnishes

Fried shallots
Croutons
Fresh coriander leaves
White pepper

1. Bring half the water to boil in a large pot. Submerge chicken in it. When water returns to a boil, partially cover and simmer steadily for 15min then cover tightly and switch off heat. Stand 30min.

2. Transfer chicken to a plate and let cool slightly. Discard skin ad peel meat from bones. Shred meat finely and set aside.

3. Return bones to the pot with ginger, garlic and remaining water then partially cover and simmer for 30min. Season with salt to taste.

4. Cook macaroni. Divide shredded chicken meat between indivdual bowls and ladle soup over. Serve with garnishes.

To make croutons

1. Trim crusts off slightly stale pieces of white bread and cut into small cubes. Heat 1/2cm of oil in a small frying pan ovr medium heat. When hot, add cubes and fry, stirring constantly until brown. Drain on kitchen paper and store airtight until serving time.

Thursday, October 30, 2008

Egg Tarts

Care for an afternoon snack?

Here's the recipe of my favourite dim sum item :) It's relatively easy to prepare. The challenging part is the crust of the tart, not so much the egg filling. I didn't have any egg tart trays so I used the muffin cups instead. It looks a bit disastrous.. :P But the taste is not too bad for a first timer!

Try this recipe and give me some feedback.


Makes 6-8

175g plain flour (sifted)
20g icing sugar
90g chilled butter
1 egg yolk
2 tsp cold water

Crust

1. Sift flour and sugar together in a large mixing bowl.
2. Cut butter into cubes and add into bowl.
3. Rub butter into flour with fingertips until mixture looks like fine breadcrumbs.
4. Add egg yolk into water and beat lightly.
5. Add egg mixture into bowl and carry on rubbing the pastry into a firm dough.
6. Grease tart trays with butter and roll out dough into the tray, slightly over the edges.

Preheat oven to 220 deg C.

Egg Filling

45 g caster sugar
120 ml water
3 eggs, beaten
1/2 tsp vanilla extract
80 ml canned evaporated milk (I use low fat evaporated milk. You can use leftover milk for Steam Chocolate Cake)

1. Boil water with sugar. When bubble forms, off fire.
2. Sieve egg mixture into the sugar water.
3. Whisk together, followed by the vanilla essence and milk.
4. Whisk further and sieve it into the pre lined trays.
5. Bake for about 20min.

Tip: they must be eaten fresh. Keeping them overnight will not taste as good.

(Source adapted: All Receipes and Usborne Children's Book of Baking)

Wednesday, October 29, 2008

Steam Moist Chocolate Cake

My colleague gave me this recipe which I thought was very good. It didn't involve any baking - only steaming.


180g butter
1 cup of castor sugar (I cut down to 2/3 cup)
200g evaporated milk (I use low fat)
2 eggs, lightly beaten with a folk
1 cup of plain flour
1/2 cup of cocoa powder
1/2 tsp baking powder
1/2 tsp baking soda
1/2 tsp vanilla essence


1. Combine castor sugar, evaporated milk, vanilla extract or essence and butter in a saucepan over low heat.

2. When sugar is dissolved and butter is melted, off fire.

3. Add the beaten eggs into the slightly cold evaporated milk mixture and stir well.

4. Sift the flour, cocoa powder, baking powder and baking soda into a large mixing bowl then pour the eggs mixture over the flour and stir well.

5. Heat up the steamer and line and grease a 20cm baking pan.

6. Pour the batter into the pan and place the pans into the steamer. Cover the top of the pan loosely with a piece of aluminium foil.

7. Steam over medium heat for 45 mins.


Top layer looks watery due to condensation but the inside is fine.


(Source adapted: lazy chef)

Monday, October 27, 2008

My food photography workshop

I attended a 2-hr food photography workshop that taught me how to place the food products, some tips and tricks in placing the food and making the food look appetising. Of course, I also learnt about lighting, reflectors and use of various lenses. There were several lenses I could play with. 60mm macro and the L lens series of 24-200mm (if I can remember correctly)

Here are some shots of what I've taken. This was not taken in a studio - it is at the instructor's maisonette @ Bedok.
Here's the raisin walnut cake.


BreadTalk Cheese Bread

If bread could talk, it would say 'Cheese'!

Friday, October 24, 2008

Welcome to Bangkok, Thailand

Thai food is often associated with lemongrass, fish sauces and spices. That's what make it so aromatic and flavourful. Indeed during my trip to Thailand in October, I just had to try their local cuisine. And that includes street side hawkers. I have a weak stomach and I'm not so inclined towards street hawkers. (Okay I rate highly on the fear factor scale) I surveyed and prowled the streets for a 'decent' looking hawker where I can lay my taste buds on. I found one outside my hostel Suk 11. He sells chicken, beef and pork on sticks. The stall was pretty neat and clean. He is very organised with the seasonings, sticks, raw and cooked food. I paid only 10 baht for it. To my surprise from a roadside stall, the chicken tasted so good! It was tender, well seasoned and flavourful! It was definitely worth it. FYI 10 baht comes to about SGD $0.40. Basically meals in Thailand are very affordable. If you are comfortable with local non restaurant dishes, give them a try.

Ok this is not the one but similar to the one I tried

I plucked up the courage again next day and gave a go at one of the stalls in Chatuchat market. It was small, wet, dark and dirty. As I was hungry, I couldn't care less. Found a seat and the owner gave us a menu in English. I picked the safer choices of minced cooked chicken and a bowl of rice. I topped up with a papaya salad (one of their local specialties). The dish seemed somewhat unappetising and unpresentable. It looked so uncooked, and untasty. It lacked colours. The 'ugly' dish came with a messy and wet setting of the stall. Hence no pictures taken. But again to my surprise, it tasted so yummy! I took another bite. Indeed it was so well prepared. It had a little gravy and it was so perfect. The fried chicken we ordered was ordinary. Nothing to rave about as it was rather dry. Papaya salad was not too bad either. Total cost: 130 baht (SGD $5.80 for 2)

Dinner was a plate of fried noodles with pork. It was only 40 baht (SGD $1.70). Simple and enough to fill my growling tummy. Another local speciality which I love is the Pad Thai. A Singapore version of it which is my favourite, can be found at Thai Express. It's so delicious. It's actually fried noodles with prawns, diced beancurd, peanuts, eggs, shredded carrots and beansprouts. Sometimes they come with some cuttlefish. This Thai Pad Thai dish I ordered was only 90 baht in a restaurant setting. Imagine the savings.....

The portion was huge!

Breakfast at Suk 11 was simple but nice. It's a cosy backpackers' inn so breakfast was a simple affair of banana muffin, tea/coffee, croissant, sliced bread with butter or jam. Of course there were fruits to complement the breakfast. I smuggled in Milo on the 2nd morning :)


See the nice table setting?

What's Thai food without Tom Yam Soup and Pineapple Rice? On our last day, we both agreed on trying Tom Yam Soup. We ordered this with Pineapple Rice and noodles again on the last day. It was a smaller serving but enough to make us salivate. 3 items came to only 480 baht (about $20.60 for 2).

It literally came in a pineapple

Of course you might have heard of people raving about the bird's nest and claypot shark's fin in Thailand. You can find that in Chinatown. Been there tried that a few years back. But try it if you haven't.


In a nutshell, food in Thailand is CHEAP! You can feast like a king and enjoy the delectable dishes right in front of you. It's not very spicy in case you are worried. In Singapore, try the authentic Thai dishes and forget about those hyped and commercialised restaurants. Go to First Thai along Purvis Street. It's located at the end of the street, next to Beach Road. The chef is a Thai and the whole coffeeshop is decorated with Thai ornaments, a pic of the Thai king and many other thai stuff. It's in the mid price level so it's quite okay. Try the Olive Fried Rice, Pineapple Rice, Fried Egg with Spinach and the Milk Tea. Of course add the meal with Chicken/Pork in Basil Leaves and end the meal with some Thai desserts.

:)

Friday, October 17, 2008

Coffee Cream Puff

This is similar to my earlier post of Chocolate Choux Puff (cream puff). Instead of chocolate, this time I used 2 tbsp of instant coffee mixed with 1 tbsp warm water to make the coffee filling. The rest of the method is the same. Enjoy!

This is how the puffs look like under 220 deg C.


Monday, October 13, 2008

Chocolate Choux Bun (aka Chocolate Cream Puff)

Sorry folks there isnt any nice pic for this one.. so here's the ecipe but I have the Ice Cream Puff (improved version) in my later posts :)

For the choux bun
65g plain flour (sifted)
2 eggs
50g butter
150ml water

For the chocolate buttercream

100g unsalted butter (softened)
80g icing sugar (orignial recipe calls for 225g!)
1 tbsp of warm water mixed with 1 tbsp cocoa powder

Method for Bun

Preheat the oven to 220 deg C. Beat the eggs in a small bowl. Cut the butter into cubes and put it into a saucepan of the water over low heat. As soon as mixture boils, take it off the heat. Quickly put the flour into the saucepan and mix well till it forms a dough ball. Add a litle egg and stir well until all the eggs are in. The mixture should be light. Spoon the mixture onto the lined trays and bake them for 10min. After 10min, bake them for another 25min at 190 deg C till puffy and golden brown. Remove the buns and poke them to remove extra steam. Meantime make the chocolate filling. When the buns are completely cooled, cut a slit in the buns and insert the filling. Then leave them to set on the wire rack.

Method for filling

Put the butter into a large mixing bowl and beat with wooden spoon till it becomes soft and creamy. Sift the sugar in and mix well. Lastly add the cocoa mixture and mix them altogether.

(Source: Usborne Kids Baking Book)

Sunday, October 12, 2008

Mango Cake - Almond Cake

I had intended to bake a Mango Sponge Cake. So I diced fresh mangoes and put into the batter to bake. Everything looked perfect. But the outcome somewhat wasn't very ideal. The sweet mango didn't go well with the batter as it baked. It became soggy and not so sweet. Maybe I shouldn't incorporate into the batter. It's either I place them on top the cake, or halfway into the baked cake with some whipped cream. Learnt something new. If I didn't try, I wouldn't know.. It was still edible, but not so ideal.

Anyhow I sprinkled some almond flakes and strawberries on top. The cake tastes good - minus the mangoes!


Tuesday, October 7, 2008

Cute and creative food pictures

My friends forwarded me this email which I found so beautifully cute and creative. Since it was a forwarded email, it's unfortunate that there isn't a source. If I can, I would credit the source But this is so beautiful that I want to share it.. You can click on the images for an enlarged version.

Enjoy!